Using the console
This is a non-technical guide for using the console. For technical documentation, please go to the next page.
To open the console:
- On desktop: press the tilde (~) key on your keyboard.
- On mobile: Swipe down the screen with two fingers.
Overview
The console is made of a number of key areas which are outlined in this section.

The Header
From left to right you are provided with these options:
- Close: Should be pretty self explanatory!
- Maximize/Minimize: Makes the window fill the screen. This is ignored when on a touch screen device with the keyboard open, as you need to be able to see the suggestions area.
- Search/Filter: This opens and closes the search and filter bar (see below).
- Info/Warning/Error/Exception/Assert Toggles: These toggles allow you to chose which types of messages you want to see in the log, and to see how many of each type you have. These work like the toggles in the Unity editor console, with a couple of differences:
- Exceptions and asserts are split out into their own buttons by default. The pink exclamation mark is for exceptions and the blue question mark is for asserts. You can combine these with errors as Unity does if you wish by modifying the appropriate setting.
- Long pressing one of the buttons will turn off all the other buttons. If all the other buttons are already turned off, long pressing it will turn them all on again. This is great for the common use case where you just want to see errors or exceptions.
 Settings: This opens the settings popup. This provides you with the option to disable the console opening automatically when an exception occurs. It also allows you to completely clear the console history.
The email option is especially useful. This allows you (or your testers) to email a copy of the complete log which can be filtered or searched. The complete log also includes a screenshot of the game (by default), hardware stats and optionally your save file and other game stats. This is great for tracking down bugs. You can see an example here.
The game version shown at the bottom of this is the version set in the Settings asset (see here). By default this is set automatically to the bundle version set in the Unity Player Settings.
Filter/Search bar
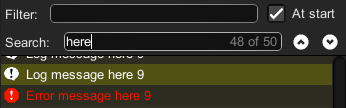
The filter bar, with a search result highlighted
The filter bar, with a search result highlighted
The Search/Filter Bar is shown by pressing the magnifying glass on the header. It provides two input fields: One for searching and one for filtering.
- Filtering will only show the items that match the string specified. The At start option on the filter line allows you to only show messages that start with the entered text. This is useful if you prefix your messages with a category name string.
- Searching will highlight all the log items that match the string specified. The arrow buttons to the right of the input field will let you move between the search results.
If you want to see log messages in context, then searching is your best bet. If you want to just see a set of log messages, then filtering is for you. You can combine the two if need be.
Only the log message is searched - not the stacktrace (currently - let me know if you'd like to search the stacktraces too!)
The Log
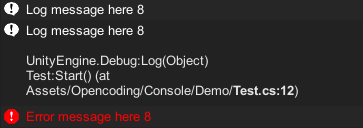
The log with an item expanded to show its stack trace.
The log with an item expanded to show its stack trace.
The log area shows the history of all Debug.Log* messages and all exceptions that occur. Only the first line of each message is shown. Clicking (or tapping) on a message will expand it to show the full log message and the stacktrace.
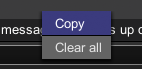
On desktop
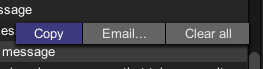
On touch-screen devices
Right clicking or long-tapping on mobile will show a context menu with the options to email (only on Android and iOS), copy the message to the clipboard or clear the log.
The Input Line
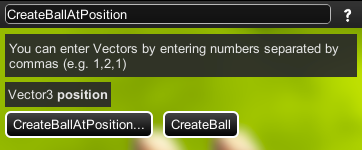
The input line showing command suggestions.
The input line showing command suggestions.
The input line at the bottom of the console lets you execute commands, and this is where a lot of the clever stuff happens. For technical users, there's more information about how to implement your own commands here.
This should be pretty straightforward, and if you've used the Windows command prompt or Mac OS X's Terminal, it should be familiar to you.
You can enter a command by typing it's name, followed by its parameters, separated by spaces. When finished, press the return/enter key to execute the command.
The console automatically will suggest options to you as you type, these appear below the keyboard. You can just tap these suggestions to use them. On a desktop computer, you can press the tab key to cycle through the suggestions.
You can use the up/down arrow keys on your keyboard to quickly select previously entered commands. On mobile, you can tap on a previously entered command in the log to put it back into the input field.
At the end of the input line there is a help button. Pressing this shows you a list of all the commands available. Tapping on one of these commands will enter it into the input field, and show you the description for it, if available.